Showing posts with label cooking. Show all posts

Wednesday, March 14, 2012

Mandy's Bytes: Dulce de Platanos

Today's recipe post stems from our new project on YouTube, You Can't Handle the Fruit! in which we try various fruits and veggies that may be intimidating because of their appearance or just fear of the unknown. After our first video featuring dragon fruit, we got a request for plantains. Since plantains need to be cooked we decided to use this recipe for Dulce de Platanos from Epicurious.

Dulce de Platanos
(Sweet Plantains in Buttered Rum and Coconut Sauce)
2 very ripe (brown to black) plantains
1/2 stick of butter
2 Tbsp dark rum
1/2 unsweetened coconut milk
1 cup sugar
1/4 cup heavy cream
First cut the ends off the plantain and peel them, then slice into diagonal slices, unfortunately for our dish the plantains we found were no where near as ripe as they should have been.

Start by melting the butter in a large skillet, the recipe says to warm the butter until the "foam subsides." We weren't really sure what that meant at first but, sure enough, the butter got foamy. And then it subsided. The butter was also just starting to brown, this is when you want to add the slices of plantain.
The slices need to cook in the butter on each side for about 3 minutes. Make sure not to crowd them too much in the pan, we used a nice big 12" skillet. After 3 minutes flip them over to cook on the other side. One they are done cooking use a slotted spoon or spatula to scoop them out onto a plate.

Save the butter, you'll be using that next. Add the sugar to the pan with what's left of the butter and stir until it caramelizes, this will take at least 5 minutes. While this is in progress, combine the coconut milk and rum in a small saucepan and heat until warm. You'll be able to smell the alcohol cooking off.
Once the sugar is fully caramelized, remove the skillet from the heat. Pour in the coconut milk mixture and whisk continuously, the caramel with bubble and produce a lot of steam, so don't let it take you by surprise. Return the pan to low heat and keep whisking until the caramel has dissolved in the coconut mixture.
After the caramel has dissolved again, return the plantain slices to the skillet and cook, without stirring for another 5 minutes until they are warm all the way through and become tender. (Since our plantains weren't ripe, so they never really got tender, which was very disappointing.) In the saucepan not heat up the heavy cream until warm.

Once the plantain slices are tender, drizzle the warm cream over the skillet and shake to mix the cream into the caramel sauce. Then let it all cool, and serve over vanilla ice cream.

You can see our You Can't Handle the Fruit! video review of plantains on our YouTube Channel.

Saturday, January 7, 2012

Holidays are over! We made it out alive!

You may have wondered where the Drapes Girls have been since Turkey day, and now that we have made it over the river and thru the woods, we are ready to share!
The holidays are always a hecktic and dreamlike adventure for us, between working out the logistics of aligning 3 healthcare worker's schedules and making the grand trek to Oregon, Christmas often leaves us exhausted and barely willing to get out  of bed let alone blog.

This year we wanted to support only local artists in our gift giving and receiving- so here are some of the presents we gently nudged our parents towards and are now happily enjoying.

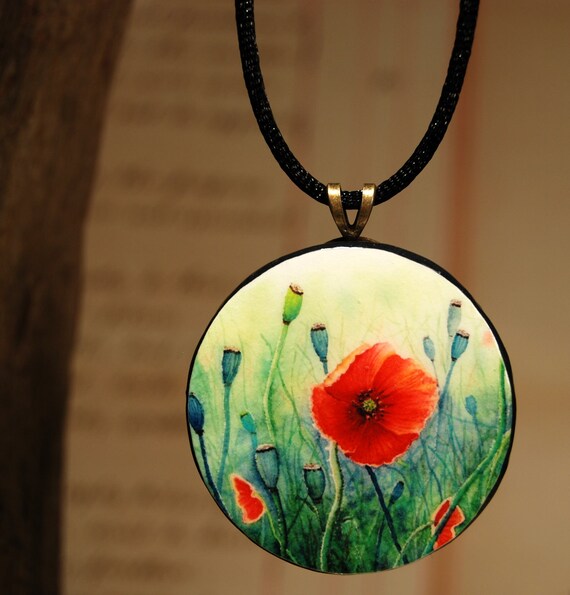
Necklace by TwistedSister Arts
Buttons By TessaAnn

Necklace By BethStone Studio

Wrap by SandMaiden


Rather than eat a simple meal and enjoy the afternoon relaxing it has always been a family tradition of ours to
1. Go shopping at the worst possible moment (christmas eve day)
2. Make an overly complicated dish  and

3. Amass such a rediculous mess in our parents small kitchen that it takes the majority of our holiday energy to clean it up!
This year it was: Aebleskivers!  Nothing like tiny fried danish pancakes to start that holiday 15lbs off in the right direction! We filled ours with a variety of things including; mozzarella, tomato and basil, fig and goat cheese, and lemon curd!

Even with all the work and driving about, we are proud to announce that it was a wonderful and joy-filled Christmas for all, brought to us mainly by the Mommy and Daddy Drapes pictured below~


Monday, October 24, 2011

Sandwich Bag Freezer Smoothies

I recently made a pretty exciting purchase while browsing the kitchen wares isle at Ross, there was a nice Black and Decker blender sitting there all alone, for just $15. In hindsight it seems a little strange that it took me so long to buy one, since they're so very useful. Naturally to celebrate the awesome blending opportunities I also bought a huge tub of plain yogurt and two big bags of frozen fruit for smoothies. On my first attempt I made almost an entire blender full of smoothie trying to balance fruit and milk and not kill my blender.
So I was very excited to find this idea via Pinterest for bags of smoothie goodies ready to just pop in the blender. Not only are these a perfect way to save time on preparation, you don't have to worry about yogurt and fresh produce going bad if you go smoothie-less for a week. The first step is to make yogurt cubes.
My boyfriend helped me out on this step with the genius idea to go piping-bag-style with the yogurt. So I dumped a huge tub into a quart freezer bag and snipped the end off to squeeze even amounts of yogurt into the ice cube trays. Stick these in the freezer and wait a few hours.
Originally I bought frozen strawberries and frozen peaches, because they were extremely cheap at Grocery Outlet. To these I added fresh bananas and kiwis and frozen blackberries, there's a world of possibilities out there.
It's not exactly easy to measure chopped and frozen fruit, but you want roughly 1 1/2 cups in each bag, and 3 yogurt cubes. Each bag is enough for two smoothies, just dump into a blender and add milk or juice until you reach the consistency you like.
I did combinations of blackberry-peach, strawberry-banana, and strawberry-kiwi. I even had one bag that ended up strawberry-blackberry-banana because I ran out of strawberries and bananas, but it was eaten right after I made it. It was clearly the weakest member of the herd.
This post in entered in the Pinterest Challenge: Round 3, you can vote for it here between Oct. 28th and Nov 3rd.

Sunday, October 9, 2011

Mandy's Bytes: No Cinnamon Apple Cake

I know I promised this post to be yesterday... but you'll have to forgive me because I've spent my first two days of a four day weekend with a cold. So I was too busy having a pity party about being sick to bake a cake yesterday.

The original recipe for this cake was one I found on A Whisk and A Spoon, I made some slight adjustments this time after making it last fall as well. My favorite part about this apple cake is that it doesn't use cinnamon! Cinnamon and apple are such an overdone combination, so this recipes use of vanilla instead is a nice change.
No Cinnamon Apple Cake
aka Fresh Apple Cake with Brown Sugar Glaze
Cake:
- 3 cups flour
- 2 cups sugar
- 1 tsp baking soda
- 1 tsp salt
- 3 eggs
- 1 1/2 cups vegetable oil
- 2 tsp vanilla
- 3 cups chopped apple
Glaze:
- 1/2 cup tightly packed brown sugar  - 3-4 Tbsp butter
- 1/2 tsp vanilla                                       - 1 Tbsp half and half

The first thing I do when making this recipe (besides preheat the oven to 350 degrees) is to chop up the apples, because it's the messiest part, and I like to get it over with. I used honeycrisp apples this time because, well if you've ever tried them you already know, and if you haven't tried them, you should. They're amazing. I actually only ended up using two apples to make three cups chopped, but obviously this will depend on the size of apples you use. You can also add chopped nuts to this recipe if you like, the original recipe calls for pecans or walnuts. In a medium bowl, combine all your dry ingredients: flour, sugar, baking soda and salt. Mix these together with a fork and set aside.

"Foamy" Eggs
In a large bowl you will now need to "beat the eggs until pale yellow and foamy." Now in the original recipe they suggest that this can be done either with a mixer or a wooden spoon. Big hint: DON'T try to beat eggs with a wooden spoon. I don't know what kind of Hulk-like upper body strength the person who wrote this recipe had, but trying to make eggs foamy by hand with a wooden spoon sucks! Of course I was much too stubborn to give up and transfer over to my mixer, resulting in eggs that were bubbly at best.

Once you eggs are nice and foamy, thanks to a mixer, you will add in the oil and vanilla. Fortunately these are easily mixed in with a wooden spoon. To this mixture add in the dry ingredients from the other bowl. Stir the dry ingredients into the liquid until the flour just disappears. The resulting batter will be very thick and, coincidentally, look quite a lot like applesauce.

Now you can stir the apples, and nuts if you choose, into the batter and mix until they are evenly dispersed. Mine ended up very wet, I think because of the apples being so juicy, but you'll be thankful later when you cake ends up super moist and delicious.

You can make this cake either in a 13" x 9" sheet cake, two 8"-9" rounds, or three 8.5" x 4.5" loaf pans. Whichever you prefer, grease it with butter or cooking spray, and spread the batter over the pan using your wooden spoon or a spatula. The dough is pretty sticky, so it needs a little coercion to get into all the corners.

The cake will need to bake at 350 for 45-50 minutes, or until the cake is golden brown and the edges begin to pull away from the sides of the pan. About 5 minutes before the cake is done baking you'll want to prepare your glaze. In a medium saucepan combine all of the glaze ingredients: brown sugar, half and half, vanilla and butter. The original glaze recipe is actually double what I have listed here, but in my opinion it was just too rich. Bring the glaze to a boil and let cook for about 5 minutes. When the cake is done, take it out of the oven and immediately pour the glaze over the top. Use a spoon or spatula to evenly distribute the glaze.
Pre-glaze Cake
Post-glaze Cake

Let the cake cool completely before serving. This is important for two reasons: 1. the glaze is very hot (hot sugar=burnt mouth) 2. the apple chunks are also very hot (hot juicy apple chunks=burnt mouth). You get the idea, you won't be able to enjoy the cake if you singe all the taste buds off your tongue with the first bite. Believe me because, being the impatient type, I'm speaking from personal experience.
Once the cake is cool, dig in! It is moist and sweet, but not too rich, and the edges have a perfect amount of crispness. I imagine it would also be great served with some vanilla ice cream on the side. This cake will be a hit, and is not too difficult, for a yummy fall dessert.

Saturday, September 24, 2011

Mandy's Bytes: Jäger-Schnitzel

As you might have noticed from the Bitchin' Cookies recipe, I don't always follow recipes very closely. And sometimes I don't even really use one. Today's post doesn't have a recipe per se, it's more like a set of guild-lines and you can make it work for you however you need to. Schnitzel is traditionally made with veal cutlets (wiener schnitzel) but this recipe uses pork, technically making it schweine schnitzel. Specifically this is Jäger-Schnitzel, which strictly speaking isn't supposed to be breaded, but it's yummy that way.
Jäger-Schnitzel:
- Pork chops
- Eggs
- Milk
- Bread crumbs
- Mushroms
- Onion
- Butter
- Gravy Packet
- Sour cream

I didn't include measurements, because it really depends on how much you want to make, and your personal preference on onion and mushroom proportions. The amounts I mention in this post make enough for two to four servings. First you can chop one medium sized onion into large slices and slice the mushrooms however thick you like. I bought 1 pound of pre-sliced mushrooms this time and they were a little thicker than I like, but no harm done. Set these aside.
Next is the fun part, tenderizing the pork chops. Since Schnitzel uses very thin pieces of meat you need to really beat up on them, so if you've had a stressful week this is a great meal idea. They should be about 1/4-1/8 inch think by the time you're done with them.

After you've tenderized the meat, set up your breading stations. One egg and about a tablespoon of milk is more than enough for four chops, and I like to use an edged baking pan for the breadcrumbs to avoid making a huge mess. First dredge the meat in the egg and milk mixture and then coat it with breadcrumbs.

After the pork chops are breaded and ready, set them aside, and get your pans prepared. I like to put about 2 tablespoons of butter in each pan, you can use oil or whatever fat you prefer. Heat both pans to med-high. In one pan place the pork chops, and brown each side. After browning turn the head down to medium.

In the other pan sautee the mushrooms and onions, I usually end up adding another tablespoon or so of butter after they are coated. Cook these until the mushrooms are tender and slightly browned, and the onions are translucent. Now it is time to the make the gravy, you can make your own gravy from the pork drippings if you like, otherwise set the pork chops aside on low heat.

In the mushroom pan turn the heat down to medium-low, push the vegetables to one side of the pan and mix the gravy according to the packet instructions in the cleared space. One packet is enough for four servings. After the powder is well mixed with the water, or broth if you like, stir the mushrooms and onions back in. The final touch is to stir in a dollop of sour cream, I use a pretty generous "dollop", because I love sour cream.

I swear there's a pork chop under there somewhere.
Serve up the pork chops with a few nice big spoonfulls of gravy and enjoy. I served this with a green bean side that is beyond simple. I steamed some fresh green beans for about 7 minutes, sauteed them with butter and garlic, added a splash of balsamic vinegar to simmer for a couple minutes and topped them with feta cheese. Jäger-Schnitzel is also great with fries to mop up any extra gravy, yum.

Tuesday, September 6, 2011

Inspiration in the Kitchen

You've probably noticed by now that I love to cook, bake, eat, all things kitchen related. Except doing dishes, just ask anyone I've ever lived with. But for the most part, the kitchen is a happy place for me. My latest kitchen project was part decoration,part organization.
Bygel Series from Ikea
First of all, the wall behind the sink was beyond boring, no window, no cabinets, no shelf, just wall. Secondly our only method of "storage" for dish scrubbers and things was cramming them in around the faucet and hoping they didn't end up at the bottom of the sink under a pile of dishes. With a little help from Ikea and I filled the blank wall with a handy rack for all my dish scrubbers, soaps and oven mitts.
This set of measuring cups and spoons is my latest acquisition when it comes to kitchen tools. Before getting these, the only measuring spoons I had were 1 tbsp and 1/4 tsp, and I inexplicably didn't have a 1/4 cup scoop despite having two different sets. The best part about them, besides the gorgeous colors, is that the whole set was only $0.99 at Grocery Outlet.

 Speaking of utensils, I shared my bird vegetable peeler in my last post, so I thought I'd round up the whole gang to show you. They are available from Animal House by Boston Warehouse, their website is not very functional but you can find these online and in most stores where they sell kitchen gadgets.

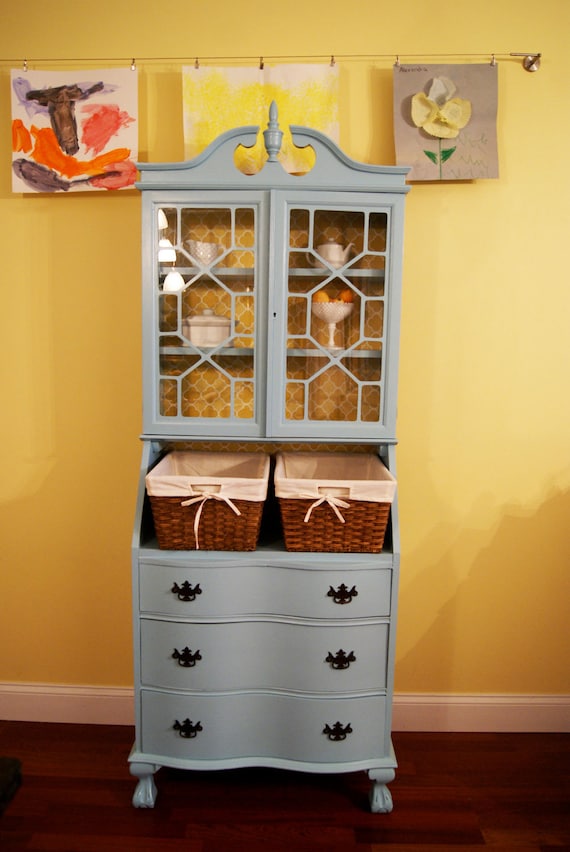
Shabby Chic Secretary Desk from 6Turner
Can you tell that I like bright colors yet? I also like storage space, which we're a little short on. For now we have a small bookcase acting as a microwave stand on another blank wall (what is it with the unused kitchen walls anyway?), but I absolutely love this cute little hutch. Although I'd prefer shelves to drawers on the bottom, I love the colors and the details on the cabinets doors.

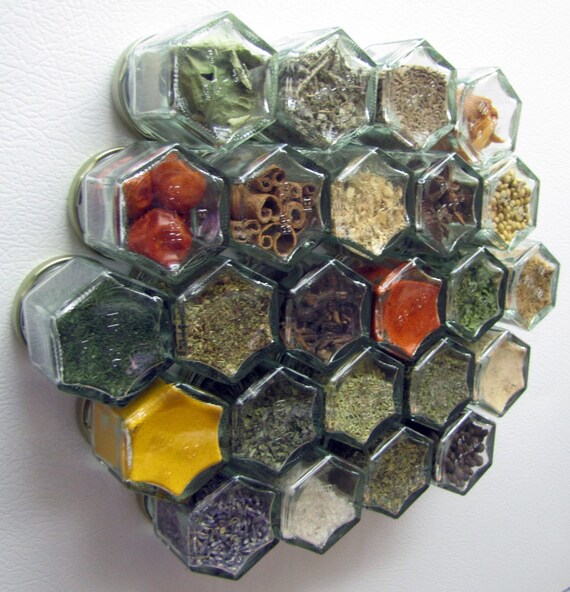
But my all time favorite kitchen item to drool over on Etsy are these amazing sets of magnetic glass spice jars from Cook Outside the Box. Now I'll admit that I probably wouldn't know what to do with all of the spices there, but I like to think that having a set on my fridge would inspire me to become a spice master.
Everything Spice Kit - Set of 24

A girl can always dream right? Speaking of dreams and decoration, I just put the final paint touches on our pegboard for the sewing room, and that baby's going up today! I'm really excited to finally put it to use. I've taken lots of pictures and will be posting a tutorial post of the process soon!

P.S. The giveaway for a free scrapbooking program ends tomorrow so get your entries in soon!

Saturday, September 3, 2011

Mandy's Bytes: German Cucumber Salad

One of the perks of my current "day job" as a home health nurse is that I have been sent home a few times now with fresh eggs and home grown cucumbers. I'll be honest, the first time they gave me cucumbers I didn't really know what to do with them. The first two things I think of when I hear cucumber are pickles, and putting slices over your eyes during a fancy spa treatment. I'm not big on spas and I don't have canning equipment so those were out.

My boyfriend's mother is German, and I hear tell makes fabulous German food, including his suggestion for the free produce: cucumber salad. When he explained a little better the basic gist of the dish, it sounded pretty damned good, so I was sold.

The first batch I made was decent, except for the fact that one cucumber out of two was extremely bitter, but you can't look a free cucumber horse in the mouth. It may not have been perfect, but it was tasty none the less. So today when I received three more cucumbers, I was pretty excited to get home and jump right into Round Two. After which I now present to you my perfected (IMHO) recipe.

German Cucumber Salad:
- 3 cucumbers
- 1 cup sour cream
- 4 tbsp vinegar
- 2 tbsp water
- 2 tbsp chives
- 1/2 tsp salt
- 1/4 tsp pepper
- 1/4 tsp dill
- 1/2 tsp minced onion


My first warning about this recipe is that it makes quite a lot, my second warning is that you really should make a lot, or it will be gone very fast.

That said, the first step is to prepare the cucumbers, wash them first, and then peel them. You don't need to be precise with the peeling, you mostly just want to get the prickly bits off. And while I'm sure you don't need a photo demostration of peeling cucumbers, I wanted to show off that I have, quite possibly, the best vegetable peeler ever. It's shaped like a bird and matches my squid whisk, hedgehog vegetable brush, octopus dish scrubber, and piranha pizza cutter.

The next step is to thinly slice the cucumber. You can do this by hand, very carefully (see ingredients: no fingers), or
with a mandolin slicer. I happen to be lucky enough to have "inherited" the Chef's Envy mandolin slicer from my mom, who got it at the As Seen On TV store and decided in retrospect that it was too dangerous considering her track record with knives. And to be fair, it is probably the most dangerous item in my kitchen in that even a reasonably careful person could maim themselves with it.

In addition to not maiming yourself, I have a couple other pointers when it comes to slicing the cucumbers. First of all, taste test each cucumber before
you combine them. If you get a very bitter cucumber there's no harm done if you leave it out (except less salad), but no amount of extra sour cream or seasoning will save your salad once those bitter slices are mixed in with the rest. The other piece of advice I learned is to separate all the slices, unsticking them may seem tedious but it's a much more difficult task when they're slathered in dressing, trust me.

Don't let a recipe hold you back!
At this point, the hard part is over with, the easiest way to go about the rest is to start by making a sort of well in the cucumber slices by pushing them to the sides of the bowl. This will make it a lot less messy when it comes time to mix it all up. Into this well add all of the other ingredients; sour cream, vinegar, water, chives, salt, pepper, onion, and dill. You can adjust the seasoning measurements to your own tastes, and feel free to add spices or leave out the ones you don't like.

For the mixing step, I had the best luck with a firm spatula, it has the strength to get the slices moving without damaging them. It's a little tricky to get the cucumber slices to cooperate as well as convincing the sour cream to be friends with the vinegar and water, which like to just puddle at the bottom of the bowl. Which brings me to the sign that the salad is done: when you push the slices aside with a spatula there should be no puddle at the bottom. 

Om nom nom!
Now just serve it up as a side dish, or by itself as a refreshing snack on a hot summer afternoon. I can't officially vouch for how long it will keep in the refrigerator, all I can say is that it never lasts long enough to go bad at my house.

No joke: I'm eating a plate of it right now as I write this post. It's amazing.

P.S. Don't forget to enter our giveaway for some free digital scrap-booking software, the giveaway ends Wednesday!


Related Posts Plugin for WordPress, Blogger...